Wednesday, March 05, 2014

Curing Cabinet: It's the Final Countdown

As promised I'm going to wrap this guy up today. At least the build part anyways. As of writing I'm about to hang my first product on the rack, so if you're still around after this series I'll be updating on what's curing, and what else is being built. (oh yes, there is more)

Buttoning up the control units: So everything is wired, I've tested the fridge to make sure there are not going to be any last second surprises like, "oh hey, the humidifier is smoking." Instead of simply disconnecting the controllers and rewiring the whole thing over again through the plate, do yourself a favor and mark every wire. I mean it, read these words out loud. Mark every wire before you disconnect it with its corresponding number and distinction of which control unit it goes to. 


As you can see I not only numbered each one, I bound each controller wires separately to one another, indicated temperature controller with a T and humidity controller with an H, and color coded just for good measure. Trust me you really don't want to do this over once you can barely see the ends while half the wires are similar in color and size. Can you tell I'm an English major by the post it notes I have laying on hand?

I slapped the front panel back on and proceeded to wire the humidity controller in first since I had placed it above the temp control and therefore in a harder to reach location. Now considering all the grief I just doled out about wiring and planning ahead, not wanting to do something over again because you didn't think it through the first time: well about that...


That's the front plate not closing all the way because there is not room enough for the humidity controller to fit in the compartment where the old temperature sensor was. But how? They are the same type of controller, the hole size for both is exactly the same...


Oh. That is the old controller on the right, next to the new temp controller which happens to be the same size as the humidity controller. I think there is an old, old, old saying that goes something like: "measure twice, cut once." In fact, I can hear my Grandpa Joe endlessly repeating it on a loop in my head as I now stare at the embodiment of my shame.

 I could lie here and now. Say I took it all in stride, picked up the pieces and moved on. But reality is never as neatly wrapped. There was panic, there was cursing, there were offers made of Faustian proportions. I thought of making a spacer around the front, drilling into the first layer of fridge, buying new control units, all before I made my final deal with the devil. 

"Measure twice, cut once," was the quote I was supposed to have remembered. The one I turned to for inspiration now is one of my favorites, and comes from an older movie called the Newton Boy's

"Like mama always said, god hates a coward."


Yep, I sawed off the back of my controllers. Just like with the humidifier before, don't bother calling tech support if you device doesn't work after this unless you just want to give them a good laugh. In fact just don't do this, I don't recommend any of it. Not only do you risk destroying or damaging the controller in the process, you also push what amounts to exposed wires very close to your metallic fridge wall. If a fire is started from your extreme tampering with these electrical components you'll have no one to blame but yourself. 

With that in mind, I insulated the back wall with a couple layers of electrical tape, shortened the exposed portion on any of my wires that were beyond what was absolutely necessary, plugged it all in, and it worked like a charm. The encounter was a victory but I think we've shown it as an example of what not to do.


A couple setting adjustments later and it was in tip top order. Now just add flesh right?

Wrong!!!

Now the not so fun part, cleaning. Cleaning cleaning cleaning. I took all the hardware that wasn't screwed down, and some that was such as the evaporator cover, out of the fridge. I used a rinse-less cleaner I've used several times before to clean and sanitize brewing equipment. 

The instructions say to use 1oz per every 5 gallons of water, but I've found it tends to be a little too potent at this concentration. It leaves the slightest film in places that have a tendency to pool. On a vertical surface, like brewing pots and fermenting bottles upside down, it won't leave a trace. But for this I dropped the concentration down to .75oz per 5 gallons. As you can see I'm wearing gloves because this stuff will dry the heck out of your hands. Not enough moisturizer in the world will do you any good for about six hours if you chose to play around with it at full strength. 

So here I am, coating every possible surface as liberally as possible and scrubbing as I go. 


Still going


Done. I can truly say that this was a fascinating build. It spanned so many levels of inquiry and different methods of achieving my final goal, and the best part is that this is only the beginning. Now the real work of meticulously tinkering begins. I'll keep you updated as I go along, and whether you can handle another build or not, the next one is already under way. Look for another project involving electricity and water, now including welding and woodwork. Until next time,
Best wishes - Tyler


Tuesday, March 04, 2014

Curing Cabinet: Last of the Open Circuits

When we last left our hero (hey just be thankful I haven't started referring to myself in the third person yet) I had pre-wired the temp and humidity controllers in. Next it was on to connecting the humidifier to my waterproof connector at the bottom of the fridge.


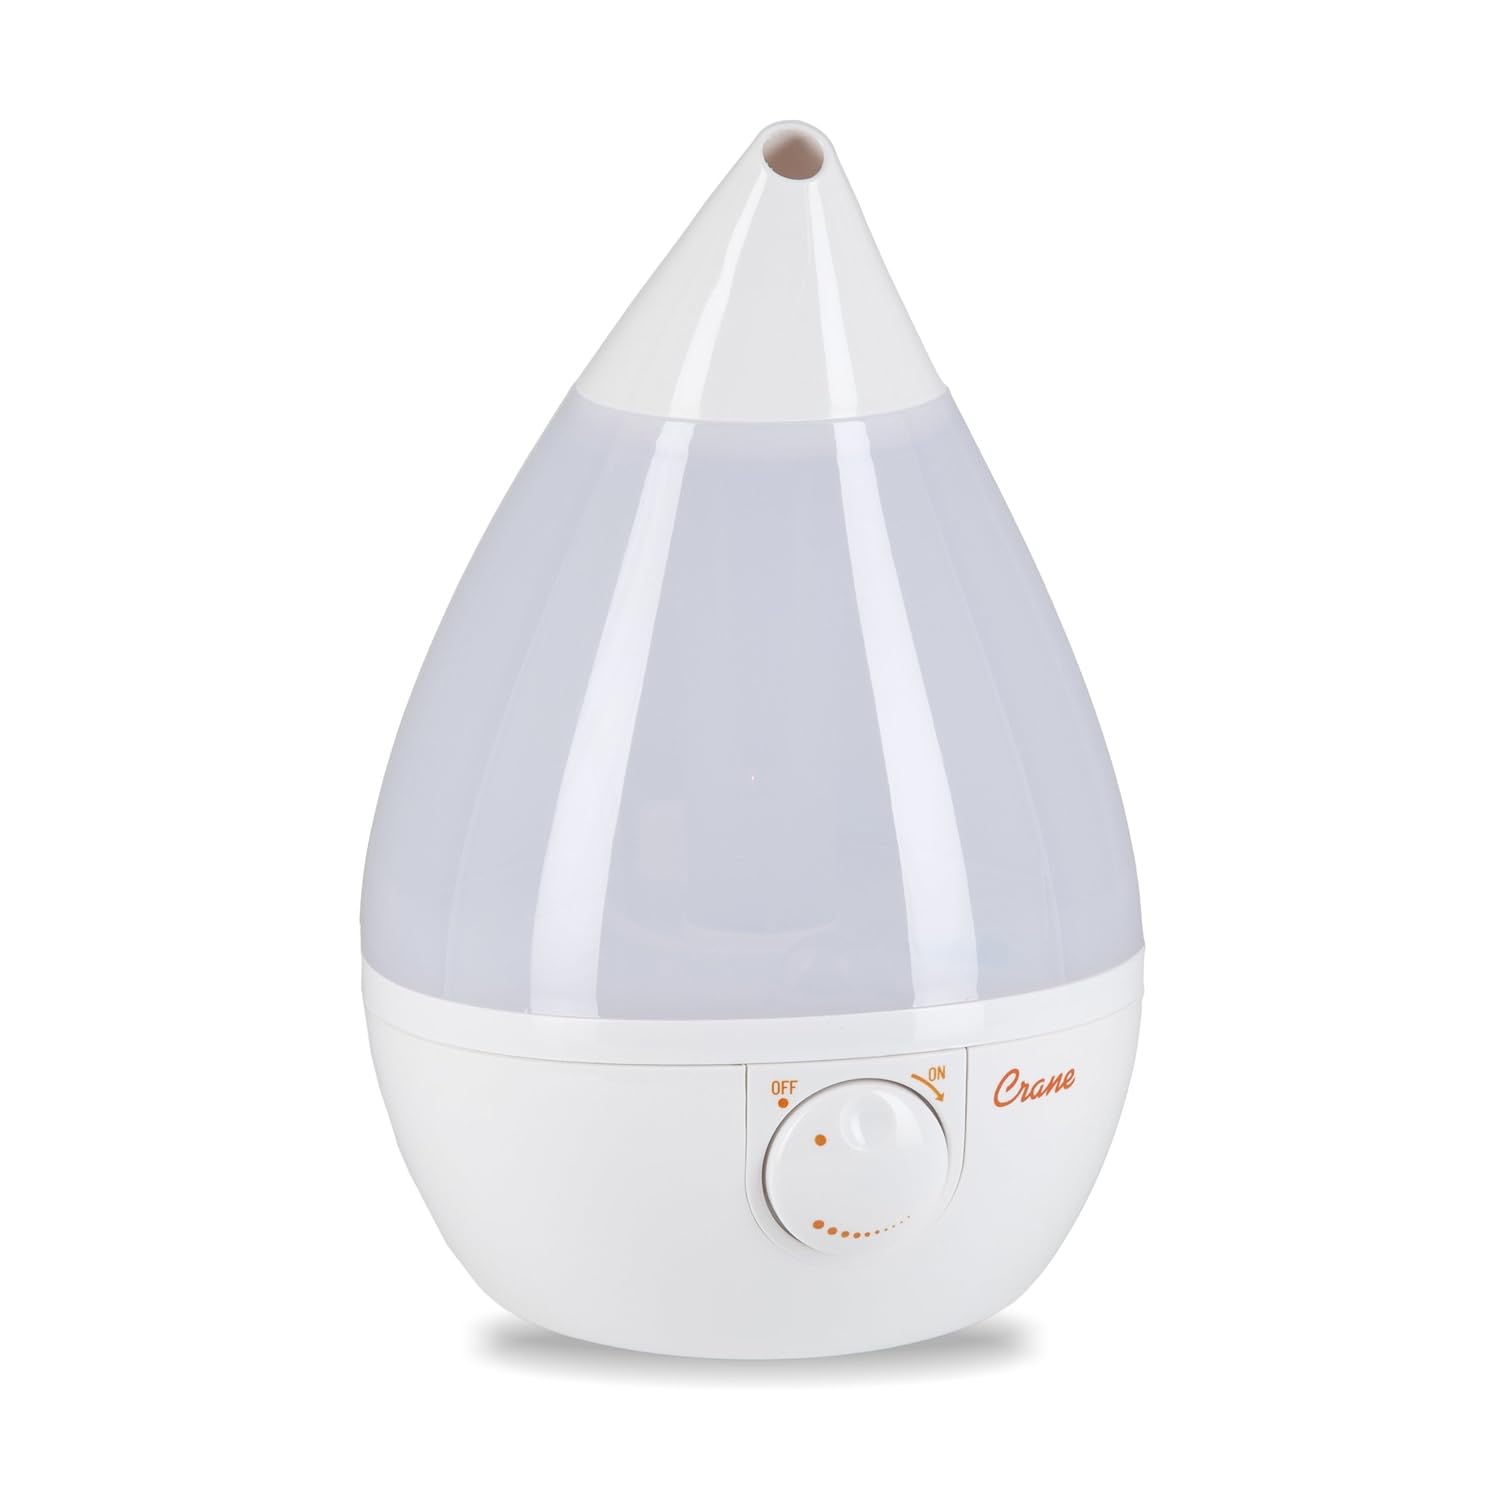
When picking out a ultrasonic humidifier (remember that this is the type you need to buy) there a tons of good options online or at local stores. Some people recommend larger tanks so you don't need to refill as often, or something a little more festive like this pig shaped humidifier.   I decided to go with something a little less obtrusive visually and purchased this one by Crane.
And as my thanks for what in all estimation seems to be a great product, I did this.


You may be tempted to wonder what your warranty options might be if the thing doesn't work so I'll save the customer service department over a Crane the five minute phone call and just laugh at you right now. Ha ha ha ha ha. If you are not comfortable with this sort of thing, or if you ever want to blame the outcome of your cured concoctions on equipment failure, do not do this. But its at least best if you hard wire the unit at the controller. I just took it one step further so I could safely remove the humidifier for cleaning.

The unit wires themselves have no indication of polarity, so I marked each with a piece of tape before severing the connection. And here is my nice, newly wired humidifier...


Living in the San Francisco East Bay I am a bit spoiled when it comes to the proper temperatures and humidity for curing or any aging process for that matter. So when I fired everything up together (I left all of the sensors hanging for now until I was sure it would work) I couldn't really get an indication if it was all working correctly. The temperature in my garage has been a steady 60F degrees, or near enough, and the humidity had been hovering around 70%. It has been raining quite a bit. So I ran it for a few days at 50F degrees and 90%. Even at these settings the fridge and humidifier didn't kick on very often.

I may install a heat lamp at some point if winters are going to keep the temperature too low and halt the curing process. Somewhere on one of the forums I read, and please if anyone sees it let me know so that I can attribute the idea, using a ceramic reptile bulb so that the chamber can remain dark. The temperature controller I used and that seems universally recommended also will control a heating unit as well.

The last thing that you may want to install upfront is a fan of some sort. The air inside the chamber needs to circulate a bit, although I've read too much circulation can also be a problem. It is going to be something I have to experiment with because my fridge has two fans up at the evaporator.


This may cause me problems in the future, but my solution will be to install a timer to the fan line. Luckily they are run in series so install will be minimal. If either this or the heater become necessary I'll probably include both just to save on the install time.

Now before we embark on the final seal up of the unit, back to that little side product I mentioned last time. As with seemingly every idea I used throughout this project I can't take credit for this one either. That distinction goes to my lovely girlfriend Jaclyn, who as I was pondering what color I wanted to paint over the VWR logo with, blurted out as if it was the most natural of solutions: "Just paint it in chalkboard paint."

Now for some of you either over the age of 30, not a hipster/don't use Pinterest, or some combination of the two, might have no idea that such a thing exists. Well here it is.


It's become quite popular in the hip restaurant scene and college dorm rooms everywhere, and considering curing, brewing, or aging anything requires meticulous documentation to perfect the process, I rewritable slate painted onto the chamber itself is all kinds of a perfect pairing. Thanks honey!

I won't bore anyone here with details of painting. If you need help figuring out how the roller works just send me an email with your address and I'll notify the proper authorities that you are home alone and require assistance, because you clearly shouldn't be left to your own devices. I will say that multiple people recommend many coats of this stuff in order to get a good chalkboard. I did 4 coats with minimal prep work, but some recommended as many as six or using a primer.  


I did the sides too. Couldn't help myself, an artist needs as much canvas as they can get.

The last steps required buttoning it all up and placing the sensors. You want your temperature readings to come from around the same height as whatever your curing. In this case I wanted it right about mid level of the fridge. I ran the two temperature sensors down the sidewall of the fridge, under one of the rack holders.


And the humidity sensor I placed just outside the shroud of the evaporator, at the top right-hand side of the fridge. Originally, as shown in the picture I had the temp sensors here as well, not remembering the advice I had read elsewhere. The quick ability of the fridge to bring the temperature down proved that the temp sensors needed to be farther from the unit. Also it was at this point I recalled the advice of placing them relative to your curing location.


To counterbalance my all these right-handed readings I placed a second humidity/temp sensor/monitor mid level on the left-hand side. This is not the same one recommended from the other website, but it had great ratings and they all do the same job.

I'm tempted here to just power it out and show you the rest, as well as the final product in all its dazzling beauty, but if you've made it this far what is one more day right? Tomorrow I'll show the finial buttoning up where I effectively roll the dice on destroying everything I'd done up to this point, and some cleaning/sterilizing advice which is the most important step once you have a working curing chamber.

See ya - Tyler

Monday, March 03, 2014

Third times a charm right? So now we'll actually get to the conversion process. This did not all come together nice, neat, and chronologically in order like its being laid out here. As pieces came in and new obstacles presented themselves the timetable of the build kind of had to go with the flow, but if you were forced to try an piece it together here the way my ADD-hurry-up-and-finish approach you might short circuit. Needless to say here's hoping your own build goes smoother but the battle can be pretty fun too.

Once again I'm going to recommend checking out this website for some of the particulars. Ben lays the wiring out very neatly and easy to follow. The first thing most fridge to curing chamber conversions need to address is how to hang the meat, but luckily for me a commercial fridge like mine is all set up with racks. All I need to do is add some hooks or tie directly to the rack. I removed all but the top racks but kept the others just in case I ever want more levels.

Here is another look at what we started with...


Just for curiosities sake I checked out VWR. I mean I wouldn't want it to be the largest semen storage facility on the West Coast. I'm sure those places maintain excellent facilities but it's not an image I want to crop up every time I hang a salami, nor do I want to even guess if or any effect this has on the curing process itself. As it turns out they are a huge international supplier of lab supplies, so while I can't be certain human liquids never entered the equation, chances are that it maintained a highly sterile existence before finding its way to me. The thing looked immaculate inside even before I cleaned the hell out of it. (More on that later)

The first real task at hand was to get some humidity control over this beast. Why you might ask? Because this is all about control, fates and providence be damned. You might as well call me captain Ahab and there be Moby Dick, the white whale of a fridge...

Well in order to properly cure we need a stable temperature and a stable humidity. Specifically we need humidity in the range of 50-70%, different cures specify slightly different humidity, plus by trial and error you'll come to find the idiosyncrasies of your particular climate and cabinet. To start we need to order a humidity controller, and an ultrasonic humidifier. You can buy a plug in humidity controller to cut down on install and difficulty but I went with Ben Starr's recommendation and wired a controller right in. Also my fridge already came with a temperature controller of the type he recommended (which I later switched out, but more on that in a bit) so I wanted it to match.  Here is more info on the whys, and more whys along with another nice build guide.

In examining the wiring to the temperature controller I noticed something I didn't recognize from any of the builds I'd read up on. namely my temp controller required three wires from its thermometer senor. Digging around I bit I realized this was a much more advanced setup that was in place then what I was prepared to get into. The fridge had previously been wired for sending its signal to a log program as well as uniformed control with other fridges. Very hive-minded stuff. While it sounded intriguing it also sounded like a lot of work I didn't need to do with other temperature controllers, so I ordered this one.


Here is an image of the old temp controller and accouterments.


Luckily all of the basic functions and inputs of the two controllers were the same. I cut a hole in the metal face plate for the humidity controller and set it aside. As with wiring anything I always recommend wiring it the first time in as easy a situation as possible, and jammed against the little pocket of space inside the compartment at the top of the fridge was not a place I could easily see what was going on. Again the wiring guide I used can be found here, and I'll only be referencing where I deviated from it.


Another benefit to this was it got me to thinking about the image of my project, so I kicked off on a little side project simultaneously. But back to the build.

I ran all of the sensors and wiring to the units back into the fridge. Now here is one of the great and worst things about mass production. When wiring is installed it is put in before the unit is sealed. When they seal the walls it isn't just with a couple screws, it also involves copious amounts of foam insulation. So once it's in, it's in for good, and nothing else is going in after it.

"Merde." (for that I really can say excuse my French) I still needed to power the humidity controller. I thought about wiring it into the temp controller power but I didn't really want to put a separate draw onto the two controllers. It would probably have been fine but the idea of the momentary power loss to one controller or the other, causing endless cycling of the two units they were controlling (the humidifier and fridge compressor) gave me pause.

Luckily here is where the magic of mass production helps us out. You see the fridge came with two options for this particular model. You could have a lighted sign installed as the temp control plate, or you didn't. Since they don't alter their manufacturing process for such a simple delineation as one light bar, they use the same wiring harness on both: meaning that there were two dead wires running the entire length of the fridge, directly back to the control unit. The two pink wires were like gifts on Christmas morning.


I would show you the control unit where I had to tie the line in at a point before the temp control cut in, but honestly I forgot and its kind of a pain in the butt to get back into once it is all sealed shut. So no.

Once everything was wired up top (again go here for specifics) I ran the humidifier wires down behind the rack bearing plate on the back wall of the fridge.


One of the reasons you use an ultrasonic humidifier is because they are filter-less, which in this case is a good thing because a filter is just waiting to grow some serious mold and spread it all over your meaty treats. But they do need to be cleaned. Removing the use of a filter just means that you are now the filter. You need to use filtered or better, distilled water in them. You need to clean them with vinegar or a light bleach solution every so often as well. Now the vinegar isn't so bad but every once in a while I really like the use of a chemical and I didn't want my love for carcinogens anywhere near something I had every intention of eating, but if I hard wired my humidifier that was exactly what I was going to be tempting. So I found this little guy on Amazon. It's a waterproof plug socket which I wired into my existing power between the humidifier and controller.


Well that's going to do it for now. At some point I need to do some school work. Tomorrow I'll post the rest of the humidifier wiring and the side project in aesthetics I undertook.

See Ya - Tyler

Sunday, March 02, 2014

Curing Cabinet: Adventures in Fridge Repair

OK, round two. At the end of my last post I may have come across as a little more prepared than was the case. Alright, it came across that I was a lot more prepared than was the case. Look, I'd just gotten a steal of a fridge, I'd seen a very solvable problem, (I thought) and I could already taste the cured bacon.

I found out the fridge used 134r, the same refrigerant type used in automotive applications. You can fill those systems yourself, why not a refrigerator? Turns out after servicing a fridge the repair companies seal the system closed, no access points, no way for your average Joe to mess around. Luckily for this post, safety and common sense don't often get in between me and a project.

Using a propane torch and silver solder, (15% seemed to be the recommended the most) I brazed the two holes at the old access lines. The next step was to install myself some access ports over where the old ones resided but I could not for the life of me find anyone who carried them here in Berkeley. Granger carries them but no longer have a store near me. So off to the Internet. These bullet piercing valves were recommended on a couple of videos and I was able to find them here in town.

Now conventional wisdom would indicate that two holes directly where the service ports are is a bit suspicious, and to be honest I had my reservations, but I was so close!!! I decided to install the bullet valve on the line itself instead of the service line because the line was smoother and the saddle of the valve would grab a better seat. Don't forget to clean and prep the area with a little sand paper before install.
Since I wasn't really sure what I was doing yet, I installed a valve on both the high and low side of the compressor. Even after reading pages and pages of forum tips everyone seems to disagree which side they like to use better, or in what instance. (I'm sure if a professional reads this he'll tell me I'm completely wrong, but hey, this is my blog and my fridge works)

Up till this point I really had only been casually glancing at repair points so I just jumped into charging the system. This was way wrong for two reasons. Number 1, I found out that the system cannot contain any air as it will block the coolant from cycling through, and thus cooling. The manufacturer recommended a minimum of -11psi. Second, and this is the most important part, there was ANOTHER LEAK I didn't know about.

At this point you might be asking yourself, "but wait, isn't freon bad for you, or the environment, or something?" Yes, Yes, and not quite so much as it used to be. R22 is what we used to use as coolant, it is highly harmful to the environment and deadly in concentrated doses, like say a one car garage where this hapless protagonist was working for a couple hours while an 18oz can was pumping away right back into said garage.

Thankfully we now use 134R. It's no peach itself as far as hazards go but it's a saint when compared to its older brother. It's still deadly in way high concentrations, has some nasty side effects but mostly for pregnant women, children, those with respiratory illness, ext. Despite its kitten like comparison I don't think anyone is recommending it as a good alternative to air. When I noticed I had a headache, and hadn't been drinking this week, I got suspicious. My suspicions were confirmed when I found the leak in the most annoying of places. Seriously you don't even get a picture because it was wedged in between a drain line and the fridge body.

After nearly gassing myself, (insert dutch oven joke or muse on this weird Nazi trend in Thailand) I hit the reset button, minus 43.50 in freon, and started over. To do the job properly I needed to vacuum the line, make sure it held, meaning no more leaks, and then charge again. But I don't have a vacuum pump? Back to the Internet!

So instead of describing everything, here is the link to get you started. I'll describe everything I did differently. From reading the posts I gathered that this system was good, but might have trouble getting the necessary pull on a system as big as mine. Really this pump idea is for things like food preservation. Intention be damned, I had a plan. I one up'd the original builders buy getting a bike pump at Walmart for $9.99 in store, or you can get it on Amazon for $14.00 which might be better then the off chance of being found at Walmart. I gotta say they have everything but what if by chance you die randomly in and around Walmart? Is that really where you want people to remember as the last place you spent on this earth?

This model of pump requires that you drill the piston out to reverse it, but it works just as well.  Also it occurred to me that the pumps themselves easily go to 100psi or more when inflating, so what was holding them back from vacuuming more then say -10psi? The check valve... Word to the wise, don't over tighten this thing. I had to buy a second one because I pressed the valve section into itself. Also I had to put a ball valve on the pump side of the check valve because the pressure is too low at the start of vacuum to hold the ball of the check valve in place. After a couple pumps it's not necessary but it also serves as a double hold if you're going to leave it under pressure for extended periods of time.

And wallah...


The steps were simple enough after that. Pull the plunger and hold, wait for the vacuum to equalise the pull with the line, close the valve, release, pull, open valve, repeat. Like I said before, after the third or fourth pull you don't need to use the ball valve anymore. The pump brought me down to -15 psi pretty quick, 5 min or so. Then it got slow, real slow. I packed it in at -19 psi or so, and waited. Now the line will equalise overnight so a drop in vacuum is to be expected, just not a huge drop. The next morning it was still holding at -16 psi so I had a winner.

Both filling up and vacuuming out through these bullet valves takes a lot longer than I expected, especially with a fridge the size of mine. You'll also need an adapter for the canister which can be found at any auto parts store along with the coolant. You need the piece on the right which has a Schrader valve inside. You don't need the valve but it also doesn't get in the way either.


I left the 134R canister on the line the whole next night. It was near empty the next day which is about right for the amount needed in the fridge. (17oz fridge, 18.5oz can including oil) Another side note, don't turn the canister upside down when filling. We want gas not liquid. If you do it isn't the end of the world, just let the fridge settle for a couple days before turning it on.

I waited a few hours before turning it on and silently prayed to the pork baby Jesus, which I assume looks like Babe with a crown of rosemary. It took all of about 30 seconds to figure out it worked, this fridge has the ability to go ice cold, instantly. If anything it's a liability to the curing process and honestly if it gets too hot at any point this summer I might rent it out for 20 min chill sessions. You know how rent is here in the Bay.

Anyways - that's all for now, stay tuned tomorrow when I'll start laying out the actual conversion process.

Pork is coming, Best - Tyler


Saturday, March 01, 2014

The unnecessarily huge Curing Cabinet...

So once upon a time, Tyler moved into an apartment in Santa Barbara with Kyle Spencer. It was a magical time filled with lazy beach days and beers to be had everywhere; but the most mystical place of all was the second fridge. The second fridge wasn't any ordinary cooler, no it had a special purpose. Its job was to slowly craft delicious pork pieces into even more savory delights. This fridge was a curing cabinet. But before too long a terrible thing happened. The person who the fridge belonged to came and took the fridge away, spirited it off beyond our reach. Since that day I've vowed to have that feeling again, vowed to own my own magical fridge. Finally that day has arrived.

Beyond the heartfelt tale of lost love I've just thrown your way, lets get down to brass tacks on the W's of my adventure. (what, when, where, who, why) To start at the beginning here would be an insult to the people who got this whole thing started off in my mind. Like I said before I was living with Kyle who as many of you know is a great chef and knows some other great chefs as well. If it weren't for their setup it may have taken me decades to even consider doing my own cured meats. As poetic as I can paint a picture of charcuterie in my mind now is, when you first encounter it it's hard not to see a locker of lukewarm meat and not be a little grossed out.

Then what occurred is the same thing that happens before all of my impromptu projects of needless extravagance, I took one look at that fridge with plug in temperature control and said, "I can build that." The gauntlet had been thrown, but of course I couldn't just build the same thing. I'd have to build it better. This led me to the majesty of Google and the abundance of so called knowledge their lies within. I found a couple of so-so sites where people had made their own, but what struck me first was that they were completely different from what I'd seen at our house. First off they had humidifiers, freaking humidity controllers, and fans, and sensors, and some weren't fridges at all, and, and...

When I'd come back down from sensory overload I settled on two things, that Ben Starr had the easiest and most comprehensive post to follow, (seriously there are points at which I'm only going to reference and link this page because I'm too lazy to retype it and I think you should be aware of where the credit truly lies) and that this guy xutfuzzy gets style points like this guy who just saunters away after almost becoming a cars afternoon snack.

Ok so its not like I had to have a glass door fridge, or even a good one. I just wanted to start small. Maybe a step up from mid sized dorm fridge? As it usually does, lady fate decided she was going to kick the door in on my goals of mediocrity. Enter craigslist, you know that website that at first glance seems really helpful, like that is a great idea right? Then you realise 90% of your interactions with people who, you'd assume are somewhat stable normal people like yourself, turn out to be either delusional or trying to scam the hell out of you. For my part I was sure it was the latter when I stumbled across the ad that changed my salami future forever.

"Large refrigerator, need to get rid of" $40 - Scam right? but it had a picture, so why not take a peek.
What! No way, it's like a unicorn, I'm having trouble looking at it directly. So I call, wife is sick of the huge fridge that has never worked and has been sitting in the garage for the last two years. Husbands back is out, so he can't help with loading, he also has no idea whats wrong because he never tried to fix it. If I come pick it up and bring 40 bucks its mine. Oh and I'm also told I'm going to need a really big truck.

So I start running down my pros and cons. Pros, look at that magnificent leviathan of a fridge, and its dirt cheap, I mean those tiny dorm room fridges I was mentioning before were going for more. Cons, It's huge, It's broken and I don't know the first thing about fridge repair, I don't have anyone to help me move tomorrow, I own a Tacoma which last time I checked was not a really big truck. My disbelief in the truck argument aside I decided to stick the consequences and pull the trigger.
Now I had a fridge and a plan. I got home, righted the fridge and let it sit for a couple days. After tipping them over you have to let all the oil and gas settle inside otherwise you can clog the compressor or worse. This was the last time I did something I was even remotely qualified to handle, besides the paint. Disclaimer: Do not try most of what you are about to see at home. If you do, you didn't read it here, and I didn't suggest it. Especially if your significant other is pissed about it.

Day three I plugged it in to get a feel for what I was up against. Electrical? Gas? Compressor? Holy hell I just bought a glorified box? Everything fired right up, lights, compressor, the works. The thermometer had been ripped out so the temp gauge was reading error but the most alarming thing was the hissing sound coming out the back. Bingo, two little holes, one in each access line. At this point I got a little scared off and decided to call an expert or two. I pulled the model info and hit the phone. "Commercial fridge? Yeah we don't do those." "Yeah we could come out, it'll be $75 for a service visit, then $250 to charge it, if thats the problem." "We don't do service calls on the weekend, unless you want to pay extra."

No thank you. It was time to bullshit my way through. Step 1, read the manual. Thankfully True MFG has all of their manuals online so I was able to get the spec's for the fridge really easy. Step two, learn enough about appliance repair to get this thing cranking. YouTube is chock full of these how to's, ranging from incredibly annoying to refreshingly helpful. Step 3, actually start the transformations from sweet fridge to epic meat locker.

Sorry this first post has been so wordy and void of photos. Tomorrow I'll post some actual build photos along with a description of the repair debacle, and almost accidentally offing myself in the process.
Best Wishes - Tyler